|
|
||||
 |
UNDELETE 360 |
| ||||||||
getting started |
|
Following is a Quick Start Guide to using Undelete 360. For more detailed information see the section in this help file titles "Working with Undelete 360". Install Undelete 360 or Run the Program from Floppy, CD, USB etc. The latest version of Undelete 360 is available for download from Download Page. If possible, avoid installing Undelete 360 to the drive from which you are trying to recover deleted files. Step 1 - Select the Drive To Search When you run Undelete 360 a main screen will be opened. To start the search for deleted files click the "Search" button. Search Button  New Drives Window will be opened. This window performs a scan to identify the devices (hard drives, digital camera, USB drive etc) that are connected to your computer. Select the device you wish to search by using your mouse to place a tick in the box next to the device name. Drives - Selecting the device to search 
Step 2 - Running the Search When the "Start" button is pressed the search is commenced. Start Button  Once the search is started the progress bar will display the number of files found and proportion of search remaining. Running the Search 
Step 3 - Managing the Results The result screen consists of four windows. - Types and Folders windows (left): This window shows you the number of deleted files that have been found (e.g. 2092 JPEG photos have been found in the screen shot below). You can also change to "Folders" and see in a folder structure the files that have been found. - Files window (top right): When a file type is selected in the left hand windows, the files found (in the case of the screen capture, the 15 Bitmap) are displayed in the Files window. Sort the files in this window by clicking on the column headings. Files found are grouped by file type in the left hand column (any files that are found that do not belong to a known file type are placed in the "Other Files" folder). Click on the file type in the left and column to display the files found for that type in the right hand column. The Results Screen 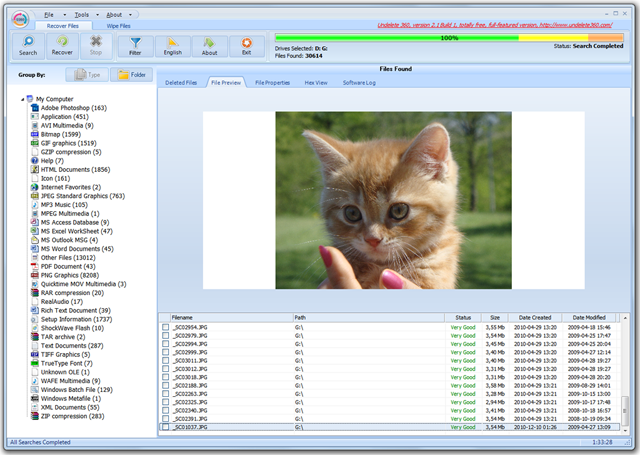 Step 4 - Saving Recovered Files Select files to be saved in the Files window by placing a tick next to the file name. Also it is possible to select multiple files by using a combination of mouse clicks whilst holding down the SHIFT key. To save selected files click the "Recover" button. Recover Button  New Recover Window will be opened. Recover window  Recovered files will be located in the folder specified by "Undelete selected file(s) to:" value. |
|
||||
Copyright © 2022 File Recovery